
When capturing geolocation data during the creation of new leads or utilizing services like GeoIP to identify user locations, incorporating Leaflet into your LWC components allows you to visually display the locations of your customers to your users.
This functionality is beneficial because it eliminates the need for users to manually search Google for specific locations, enabling them to navigate the area directly on the map.
In this guide, we will leverage the Metadata API to configure everything. So, let’s proceed with coding our new component.
Incorporating the LeafletJS library
Place the downloaded ZIP file into the static resource directory and generate its manifest file. If your file is named “leaflet.js,” your manifest file should be named “leaflet.resource-meta.xml.”
The manifest file should have the following structure. Set the Cache-Control header to “public” to enable caching in the Salesforce CDN for faster downloads, and set the Content-Type to “application/zip” to allow Salesforce to unzip the file and access its contents.
<?xml version="1.0" encoding="UTF-8"?>
<StaticResource xmlns="<http://soap.sforce.com/2006/04/metadata>">
    <cacheControl>Public</cacheControl>
    <contentType>application/zip</contentType>
    <description>Leaflet 1.7.1</description>
</StaticResource>
Getting our new component ready
Salesforce offers two methods for loading external libraries: loadStyle and loadScript, which are part of the Platform Resource Loader. These methods are detailed in the “Use Third-Party JavaScript Libraries” article. They return promises, allowing us to wait for them to finish loading before we begin using the requested files.
We’ll begin by creating a new component called OpportunityMap to display our map. Create the following files: opportunityMap.js, opportunityMap.html, opportunityMap.css, and its corresponding manifest file, which should resemble the following structure:
<?xml version="1.0" encoding="UTF-8"?>
<LightningComponentBundle xmlns="<http://soap.sforce.com/2006/04/metadata>" fqn="sonneilDevelopmentAvailability">
    <apiVersion>49.0</apiVersion>
    <isExposed>true</isExposed>
    <masterLabel>Opportunity Map</masterLabel>
    <targets>
        <target>lightning__RecordPage</target>
    </targets>
    <targetConfigs>
        <targetConfig targets="lightning__RecordPage">
            <objects>
                <object>Opportunity</object>
            </objects>
            <property name="height" type="Integer" min="50" required="true" default="200" label="Height (in pixels)"/>
        </targetConfig>
    </targetConfigs>
</LightningComponentBundle>
In this manifest file, we set up our component to be accessible on the Opportunity object’s details page because we’ll require the record ID to retrieve our customer’s location.
Additionally, we include a configurable property to enable adjusting the height of our component. This way, we can easily set its height depending on where we place it.
In the opportunityMap.html file, we only need a div where we’ll display the map. Therefore, type the following:
<template>
    <div class="slds-box slds-theme_default"></div>
</template>
We incorporate the slds-box and slds-theme_default classes to ensure alignment with the Salesforce Design System. The slds-box class provides spacing, borders, and rounded corners, while the slds-theme_default class adds a white background during the map’s loading process.
Developing our component
If we test our component, we will only have a 50px height rectangle, so let’s add code.
First, we import all the required dependencies:
import { api, LightningElement } from 'lwc';
import { loadScript, loadStyle } from 'lightning/platformResourceLoader';
import LEAFLET from '@salesforce/resourceUrl/leaflet';
When loading LeafletJS, ensure that you use the same name you uploaded it with.
Starting with the OpportunityMap class, we need to include the recordId and height properties. The recordId property will be automatically populated by Salesforce with the current Opportunity ID, while the height property will store the value used when the component is added to a page.
export default class InquiryMap extends LightningElement {
    @api recordId;
    @api height;
}
Next, we’ll utilize the connectedCallback and renderedCallback methods to load the LeafletJS library. These methods are part of the Lifecycle hooks. connectedCallback is triggered when the component is inserted into a document, while renderedCallback is executed after every render of the component.
import { api, LightningElement } from 'lwc';
import { loadScript, loadStyle } from 'lightning/platformResourceLoader';
import LEAFLET from '@salesforce/resourceUrl/leaflet';

export default class InquiryMap extends LightningElement {
    @api recordId;
    @api height;

    renderedCallback() {
        this.template.querySelector('div').style.height = `${this.height}px`;
    }

    connectedCallback() {
        Promise.all([
            loadStyle(this, LEAFLET + '/leaflet.css'),
            loadScript(this, LEAFLET + '/leaflet.js'),
        ]).then(() => {
            // Leaflet should be ready, create a new draw method
            // this.draw();
        });
    }
}
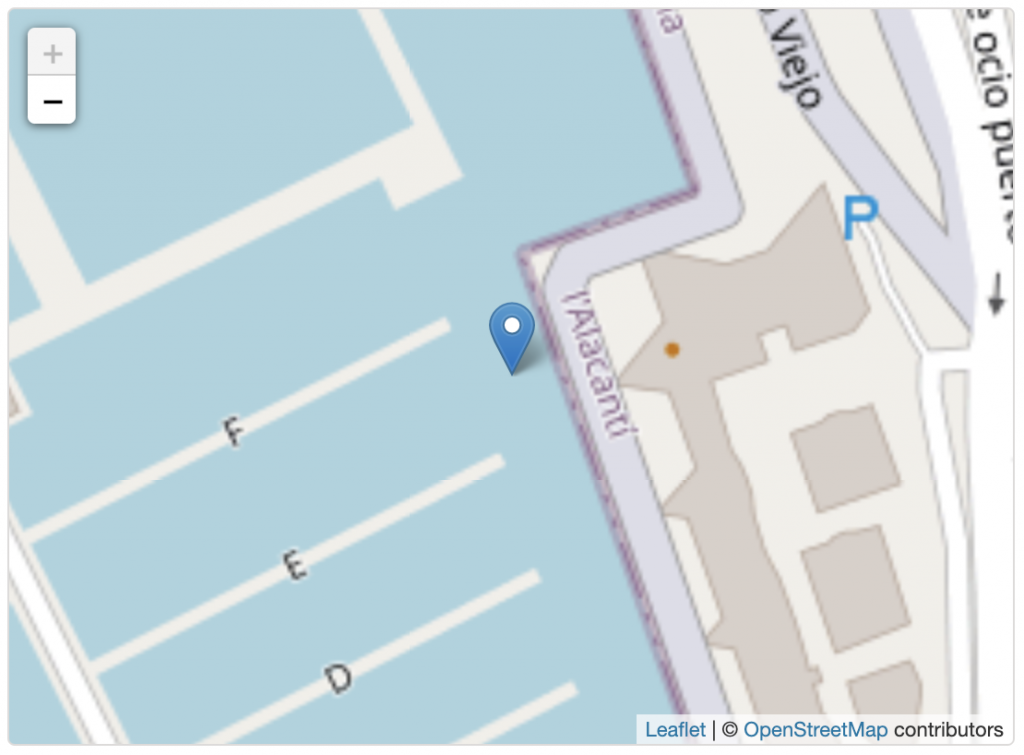
After the promises are resolved, Leaflet is ready for instantiation. Thus, we will define a new draw method, where we’ll create the map and add a marker. We’ll utilize OpenStreetMap tiles and place a test marker near our offices in Alicante, Spain.
draw() {
let container = this.template.querySelector('div');
let position = [38.341891109801594, -0.48035610027642234];
let map = L.map(container, { scrollWheelZoom: false }).setView(position, 13);
L.tileLayer('https://{s}.tile.openstreetmap.org/{z}/{x}/{y}.png', {
attribution: '© <a href="<https://www.openstreetmap.org/copyright>">OpenStreetMap</a> contributors',
}).addTo(map);
let marker = L.marker(position).addTo(map);
let featureGroup = L.featureGroup([marker]).addTo(map);
map.fitBounds(featureGroup.getBounds());
}
Now, when you add this component to the Opportunity Page, you should observe something similar to this:
Incorporating actual data from our Opportunity record
In the earlier section, we included a sample point, but now we aim to display the actual location of our customer. Presumably, you’re already storing the latitude/longitude in your records; for instance, in our scenario, we have a custom Geolocation field.
You can utilize the wire service and getRecord to retrieve the value of this field. However, in our case, we crafted a controller to provide this and other necessary values. We store additional useful information for displaying on the map, such as our customer’s time zone and local time. We can incorporate this method as another promise when loading LeafletJS:
connectedCallback() {
    Promise.all([
        // ...
        getOppportunityMapData({ recordId: this.recordId }),
    ]).then(([st, sc, opportunity]) => {
        this.opportunity = opportunity;
        this.draw();
    });
}
And now, we can update our draw method:
draw() {
    // ...
    let position = [
        this.opportunity.location__latitude__s,
        this.opportunity.location__longitude__s
    ];
    // ...
}
The map overlaps with the header bar.
Because the LeafletJS map has a default z-index of 400, it’s common for the map to overlap with the Salesforce navigation bar. This issue can be resolved by adjusting the container’s z-index in opportunityMap.css.
div {
    z-index: 0
}
I hope this article assists you in supporting your Salesforce users =) If you have any questions, please don’t hesitate to ask in the comments section!